Getting the shot takes more than just having a nice underwater camera system. It takes a little bit of knowledge of the mechanics of the shot itself – i.e. camera & lens type, aperture, shutter speed, ISO settings used, together what flash lighting was involved.
As you peruse through your favorite dive magazine or website, you’ll probably come across an image or two that captures your imagination and even perhaps inspires you to think “wow, I’d like to be there!”
When I hear comments like this from fellow divers, they usually add something like “they must have a really nice camera.”
And if they are kind enough to be complementing one of my photos and ask me about the hardware I used to create the image, my answer would be: “Yes, I do have a nice camera.”
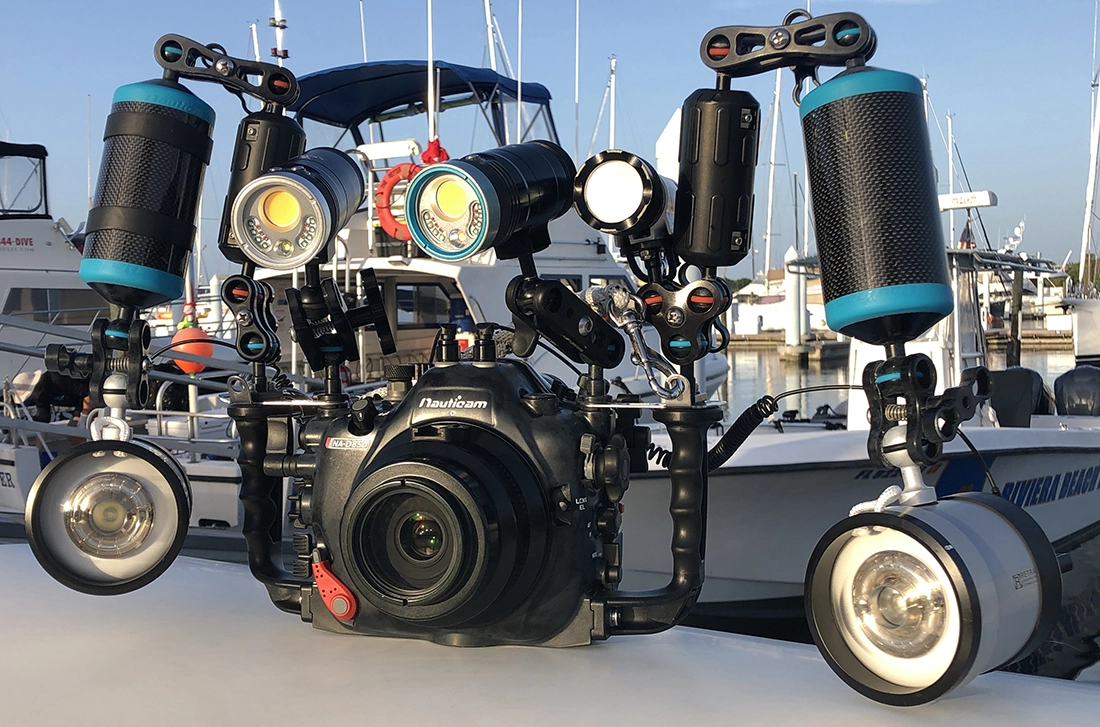
My current rig is a Nikon D850 DSLR in a Nauticam housing with a range of lenses and lighting provided by Retra Pro Max and Prime strobes. Some of my prior setups included a Nikon D500 and D300 DSLR’s as well as a few in the Canon camp, the last of which were both the 7D and 7Dmk II.
If I’m discussing one of my images with to a fellow photographer, the conversation will usually move on to the mechanics of the shot itself – i.e. the make/model of the camera and lens, what aperture, shutter speed, ISO settings were used, and so forth. And if flash lighting was involved, they will want to know what model strobes, power settings and placements were employed.
But while these specific details can be somewhat informative, to be honest, it only provides one part of the picture (excuse the pun). To fully grasp the technicalities of a particular shot oftentimes requires a deeper dive (again with the puns) into the variables behind the image. In addition to equipment and the basic photographic processes, there are a number of additional elements that come into play.
As underwater photographers, we work in an environment that has numerous variables and uncertainties that you do not encounter in a studio setting. Dealing with the environmental conditions under which we work means not only understanding light and composition, but also developing a thorough understanding of the limitations of the environment. It also helps to have some comprehension of animal behavior. Do your homework, and it’s amazing how even just a little bit of knowledge can improve your overall image results.
Breaking Down the Shot
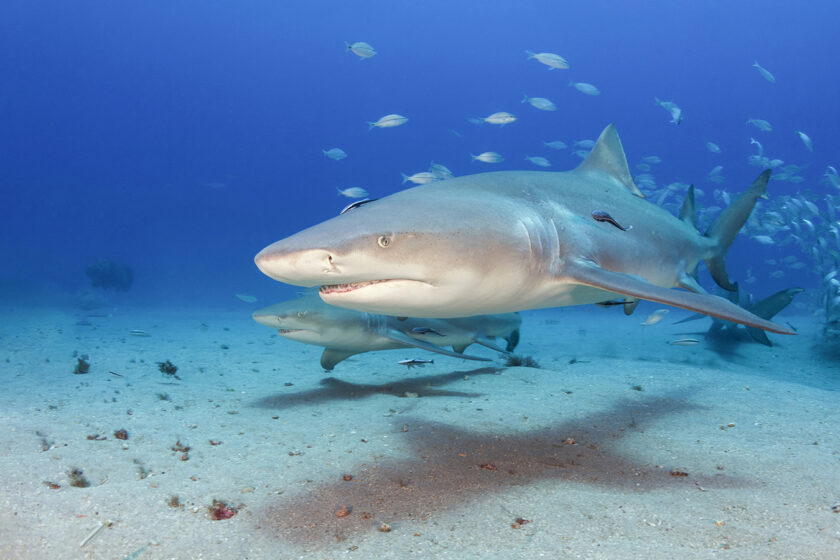
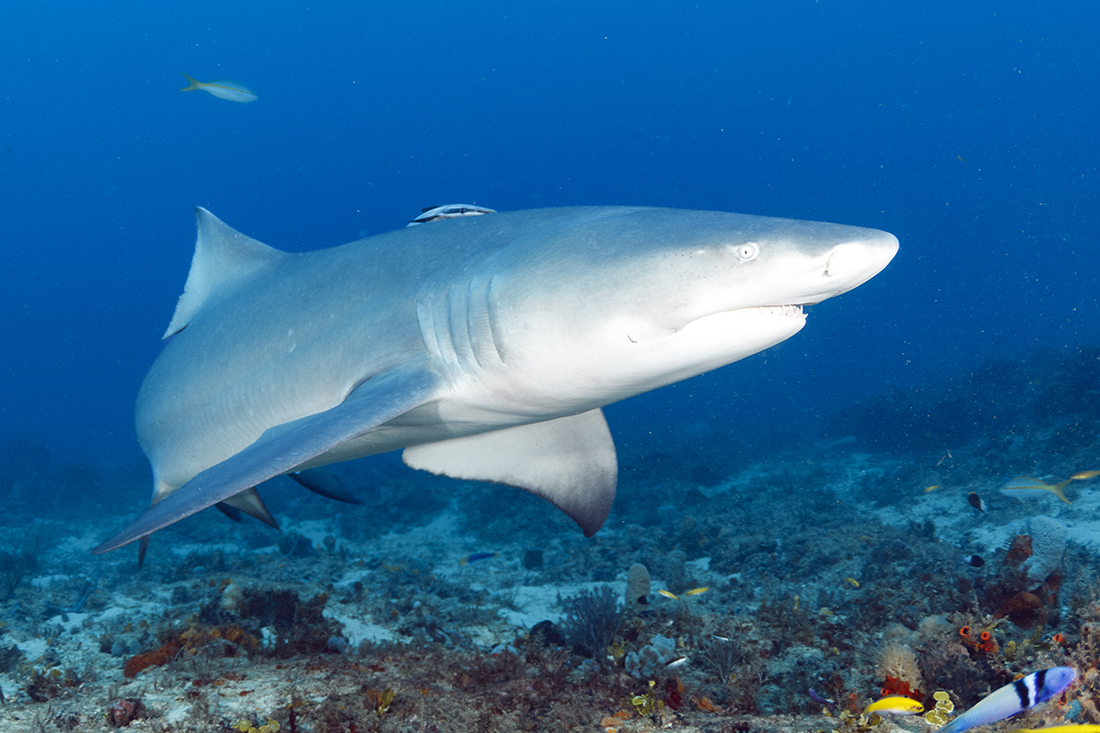
For a little bit of fun, let’s dig a little deeper into the mechanics of the shot of the lemon shark from the opening of this page.

The camera used for this particular shot was a Canon 7D fitted with a Tokina 10-17 fisheye zoom lens. Why not my Nikon D850 you ask? Well, back then, that was the model camera I used for all my photo work. One of the reasons I chose this particular shot as an example is to illustrate the point that you don’t need the latest and greatest in digital camera bodies to get a quality image. It’s a matter of knowing how to use what you have.
And in case you are wondering about the mechanics of the shot: all camera settings were in manual mode with the shutter speed set at 1/180 with the ISO at 250 and lens focal length at 17mm with aperture at f/8. And seeing that the shark in the foreground is well-illuminated and showing its actual coloration, it’s obvious that I used some sort of lighting. My favored strobes at that time were Sea & Sea YS-250s set in manual mode, —not TTL — with both set at ¼ power.
Now, with all that out of the way, we can get to the part where the rubber meets the road. The shot itself was NOT taken at Tiger Beach in the Bahamas, but off Jupiter Florida, where a small group of dive operators run shark dives. If you are looking for access to species like lemon, bull, reef, sandbar and silky (the primary species we see here) and sometimes even tiger and greater hammerheads, this part of South Florida can be a nice alternative to traveling to the Bahamas during the late winter to late spring months.
Getting the sharks to show up isn’t usually a problem but capturing compelling images can create some challenges. To get the sharks in close enough for photo ops requires baiting. To avoid violation of State law, dives of this nature are performed in Federal waters 3 miles or more offshore, where the bottom is no shallower than 80-90 feet. So, you can forget the bright shallows and white sand bottoms that facilitate shooting at Tiger Beach.
That said, conditions that day were as close to ideal as you could hope for off the Florida coast. We had a clear sky and plenty of sunshine, wave heights less than two feet and some of the best of underwater visibility of the season at a spectacular 80-feet, which rendered the ocean from top to bottom a beautiful azure blue.
My goal for the day was to catch some nice portrait shots of the lemon sharks as they cruised into range. To do that my first order of business was preselecting a fast enough shutter speed to freeze most of their motion in the shot. While most of their movements could be described as lazy, they were still traveling fast enough to require at least 1/125 of a second shutter speed. To hedge my bets, I thought 1/180 of a second would be a slightly better sync speed to do the job.
Next up was selecting the right aperture. Wide-angle lenses — especially super-wides and fisheyes — retain a surprisingly good depth of field when opened up as wide as f/4. For fisheyes, the sweet spot for handling large subjects at a relatively close range is between f/5.6 and f/11. Taking into account that the average-sized lemon measures about 6 feet from the tip of its nose to the fork of its tail, I chose to rack in the focal range of the 10-17mm lens to 17mm, with the aperture at f/8. That meant I could easily get the shark’s entire body in frame and in focus from end-to-end once they swam within an optimum range of 3 to 4 feet from the lens.
OK, so now that shutter speed and aperture is out of the way, let’s talk ISO.
As a refresher, ISO (an acronym for International Organization for Standardization) is the ranking pertaining to film or a digital sensor’s sensitivity to light. A lower ISO value means less sensitivity to light, while a higher ISO means more sensitivity. ISO is the third critical variable in the equation involved in a digital camera’s ability to render an image (shutter speed and aperture the other two). Unlike the days of film photography where you had to work exclusively with that film’s decided predetermined ISO (aka “film speed”), digital cameras allow you the luxury of setting ISO exactly where you want it.
Remember how beautiful the color of the water was that day? I wanted to capture that blue in the frame as well. Seeing that I had already set my parameters to deal with motion and depth of field, my one remaining place for wiggle room was the camera’s ISO setting.
Even with excellent underwater clarity such as we had that day, at a depth 90 feet, you don’t have as much ambient light as you think. Experience has taught me that the effective baseline when working in depths between 60 and 100 feet was generally between 200 to 400 ISO. To get a better idea of the level of ambient light I would be dealing with required me to take a few meters readings up and down the water column while facing in the direction I intended to shoot (the meter mode was set to spot, not matrix). My tests at f/8 showed 250 ISO to be the ticket.
Camera settings – shutter speed, aperture, ISO. Check, check, check. Now the only thing left to prep was the strobe settings.
The importance of additional lighting by underwater flash or a continuous light source other than the sun goes without saying. But when you are looking to illuminate your subject just enough in the foreground to bring out most of its coloration while still looking natural, the trick is to not overdo it.
Too much added light and anything hot (whites and light grey on a shark for example) will, without fail, get blown out. Instead, by going less heavy-handed on the strobe’s power setting you will get closer to striking the balance between what is immediately in front of you and the natural light provided by the sun in the background.
Learning how to properly balance (read my follow up article Balancing Flash With Ambient Light to learn more ) those two light sources at the same time can be an art in itself. It’s something we will delve deeper into in future installment of this column. Till then, here is what and why I did what I did regarding the aforementioned settings on my Sea & Sea YS-250s.
Other than the small amount of light reddish-pink coloration around in their mouth, my shark subjects were predominately light grey with a white underside. This left leaving little in the way of vibrant coloration to worry about. Keeping that in mind, I knew the primary mission for strobes when powered down to 1/4 power was to knock out most of the shadows on the shark’s body as it came in close.
As for my choice for manual mode vs. TTL… well, I’m old school. I prefer to leave most of the creativity to myself rather than placing too much trust in the functionality of through-the-lens metering.
Granted, the mathematical algorithms incorporated in a modern DSLR camera’s settings can be pretty amazing. But where things often go wrong is when that system is placed in Aperture Priority or Program mode with the strobes set in TTL, and then confronted with a wide-angle scenario like I just described. In place of the water column coming out in a rich shade of blue, the background is either entirely blown out or a super-dark tint somewhere between navy blue and black. This happens largely because the camera’s metering algorithm becomes fixated on the subject in the foreground while ignoring the ambient light levels in the background.
I will not sugarcoat it. Shooting manually is challenging because you now must think. This includes evaluating what you have to work with every time you enter the water.
Besides underwater visibility, which is the most obvious thing we look at, you now must consider how much ambient light is available. Is it bright and sunny topsides, or is the sky deeply overcast? What is the bottom below you: white sand, dark sand, rock, or no bottom at all but just a deep blue void?
As a photographer, you should be taking all of these variables into account when choosing power settings for your strobes — not just the mechanical aspects like shutter speed, ISO and F-stop.
Making this point was the main purpose of the exercise this time around. And while there is still so many more topics to discuss like composition, lighting techniques and animal behavior, they will have to wait for the next time. Until then, just remember that the most creative photographer is a thinking photographer who is always seeking better pathways toward improving their art.
